Navigating a Project
In addition to built-in REAPER functions, ReaClassical uses a series of keyboard shortcuts to help you easily navigate your classical project. You can of course still navigate by clicking around with the mouse as you would in any REAPER project; the shortcuts are there to make it faster, and to make it possible without the mouse at all. Important: I always make some dedicated time post-recording to get an overview of the recorded material, tidy up the digital notes I took during the session and perform a backup on an external drive as soon as possible.
Whole Project
Use Ctrl+Alt+→ (or Ctrl+Alt+←) to see the whole project horizontally and/or Ctrl+Alt+↓ (or Ctrl+Alt+↑) to see everything vertically. If you want to zoom both horizontally and vertically at the same time, use ` (backtick). REAPER's own Home and End keys take you to the start or end of the project. + and - zoom in and out horizontally.
Tracks and Folders
The arrow keys move you around the project without the mouse. Each move selects the track and announces it (name, peak level and any mute or solo state):
- ↓ and ↑: next and previous track within the current folder. In a project with a single track per folder these move between folders instead
- Alt+↓ and Alt+↑: next and previous folder
- D: the first folder in the project
Moving to a folder makes it the folder you hear (the others are muted) and selects the item nearest the edit cursor. If a special track such as an aux, submix or reference is selected, ↓ and ↑ step through the visible special tracks instead. To jump straight to a track by name, press Shift+J and type part of its name.
Finding Takes
Use Enter on the main keyboard or numpad to quickly search for a take based on the underlying filename of the media item. This will work for any file-naming system that uses numbers before the file extension such as mainpair-T04.wav, cello-spot-take23.flac or even ortfpair(04).wav such as created by Presonus Studio One. Note that if the imported or recorded files have zero-padding that is not a problem. If you have used an item to create an S-D edit, searching for a take will ignore these items and move directly to the original sources. In F5 preferences, you can set to search by item name instead. In the ReaClassical Notes app N, you can override and reset take numbers. These take priority in the search.
Jump to Time
Press J to jump to a specific absolute or relative time using right-aligned logic, similar to video editing applications. Press Ctrl+J to do the same within the selected item or a set of consecutive crossfaded items, where an absolute time counts from the start of that selection. Prefix with + or - to make relative jumps from the current cursor position. Colons are ignored, so 1:23:45:10 and 01234510 are read the same way. Once you get the hang of using this input logic, moving to any position is extremely quick!
Some Right-Aligned Logic Examples
| Input | Meaning (based on project frame rate) |
|---|---|
100524 |
Move to absolute position 10m 5s 24f |
1141711 |
Move to absolute position 1h 14m 17s 11f |
+8 |
Jump forward by 8 frames |
-1015 |
Jump backward by 10s 15f |
+23000 |
Jump forward by 2m 30s (and 0 frames) |
Items & Markers
You can shuffle back and forth between item edges and fades by using ← and → (or Q and W). While editing a crossfade these move through the crossfade, and with an envelope selected they move between its points. More precise item moves:
- Alt+← and Alt+→: start and end of the selected item
- Ctrl+Shift+← and Ctrl+Shift+→: first and last item on the track
- Shift+Q and Shift+W: start and end of the folder
- Alt+Q and Alt+W: previous and next group of crossfaded items
Move between markers by using the , and . keys (by design given on my keyboard they are the same keys that have < and >).
Markers, Regions and Time Selection
- M adds a marker at the cursor and Alt+M inserts or edits a marker (to give it a name). Ctrl+M deletes the marker nearest the cursor, Ctrl+Shift+M moves the nearest marker to the cursor, Ctrl+Shift+G deletes all generic markers and L opens REAPER's region and marker manager. S-D markers use their own keys; see Editing
- ; creates a region from each selected item, named after the active take, : creates a region from the time selection, and Ctrl+Alt+R deletes all regions
- [ and ] set the start and end of the time selection at the cursor, Ctrl+] and Ctrl+[ move the cursor to the start and end of the time selection, and / sets the time selection to the selected items
- 0 deselects all items
Parents & Children
ReaClassical can hide or show children of track folders. This means that editing multi-track classical music can be as easy as editing a stereo track. Making an edit to the parent track automatically makes the same one to all the children too. To show or hide the children, select the parent track and press E. The other benefit is that a whole set of takes can be displayed vertically in the main editing window without too much effort.
Peaks Display
To adjust the visual zoom of wave peaks, use Ctrl+↑ and Ctrl+↓. This is purely visual and allows for easier editing of quieter sections.
ReaClassical S-D Editing Toolbar
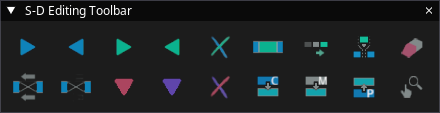
While I designed ReaClassical to be used efficiently with keyboard shortcuts, there is a custom S-D editing toolbar for those that prefer it. However I do highly recommend learning the key strokes as you will find your editing speeds improve dramatically. The floating toolbar can be opened via F6 but will automatically open once when you start source-destination editing. Right-click to set a different icon layout and/or zoom. Hover over the icons to discover what is available.
ReaClassical Top Menu
At the top of the arrange window, you will see a dedicated ReaClassical menu (in between Options and Extensions). While not intended to be used as the primary way of running ReaClassical functions, it is an organized way of discovering the individual available functions and learning the keyboard shortcuts.
Screen reader users (Clara)
Every navigation move above is announced, so no extra step is needed. Use Shift+J to go straight to a track by name, and ! to hear the last announcement again. The announcement shortcuts for take number, timeline position and items in the folder are listed in Using ReaClassical with a Screen Reader.
Summary of Track Types in ReaClassical
While some of these will be covered later in the manual, it is useful to give a summary of track types you can currently use in ReaClassical. First, we have the regular folder or folder of tracks shown in the arrange window. These are where you record or import takes. Second, we have the mixer tracks designated via M: prefix. These tracks shown only in the mixer are where you adjust the usual track controls such as names, pan, volume, phase, add FX etc. Their names are synced across the project via when added or renamed via Mission Control. Third, we have aux busses designated via @ prefix. You can route mixer tracks to these to use as a reverb bus etc. Fourth, we have submix busses designated via # prefix. You can route mixer tracks to these as a way to collect together microphones from the same orchestral section etc. Fifth, we have a dedicated room tone track where you can place recorded or generated room tone (more on this in the mastering section). Sixth, we have the RCMASTER bus which leads directly to the master REAPER bus. Here you can gain stage into the master bus, add FX etc. Seventh, we have reference tracks which lie outside of the RCMASTER structure thereby allowing the user to quickly make comparisons with other imported material via the audition shortcuts. Next, there is the possibility of a live bounce track. This also lies outside of the RCMASTER structure and is a way to capture a live stereo mix from the RCMASTER track.
Note
Live bounce tracks are only available when recording in a horizontal workflow.
Next, another track outside of the RCMASTER structure is the listenback track. This is a way to monitor musicians, conductors, producers etc who might be far away and need to communicate with the recording engineer via a microphone channel. There is also a playback track (a maximum of one, shown in the mixer only, created muted) that you can send to a chosen pair of hardware outputs and unmute for monitoring with Ctrl+Alt+Shift+P. Finally, the master bus itself where again you can set final levels, add FX etc. As mentioned elsewhere, try not to delete the mixer tracks or RCMASTER. But, even if you do by accident, open Mission Control C to recreate them.
Important
A reminder to do all track management in Mission Control!